Attic Water Heaters: Why Leaks Are High-Risk & What To Do
Water heater in the attic and spotting a leak? Learn why these setups are high-risk, what to do immediately, and how we inspect and fix them safely.
When a Drip in the Ceiling Leads Us to the Attic
We recently got a call from a homeowner — let’s call her Emily — who was understandably stressed. She’d noticed a small wet spot on her carpet, then heard a single drip from the ceiling. When she went to investigate, she remembered that her water heater was in the attic.
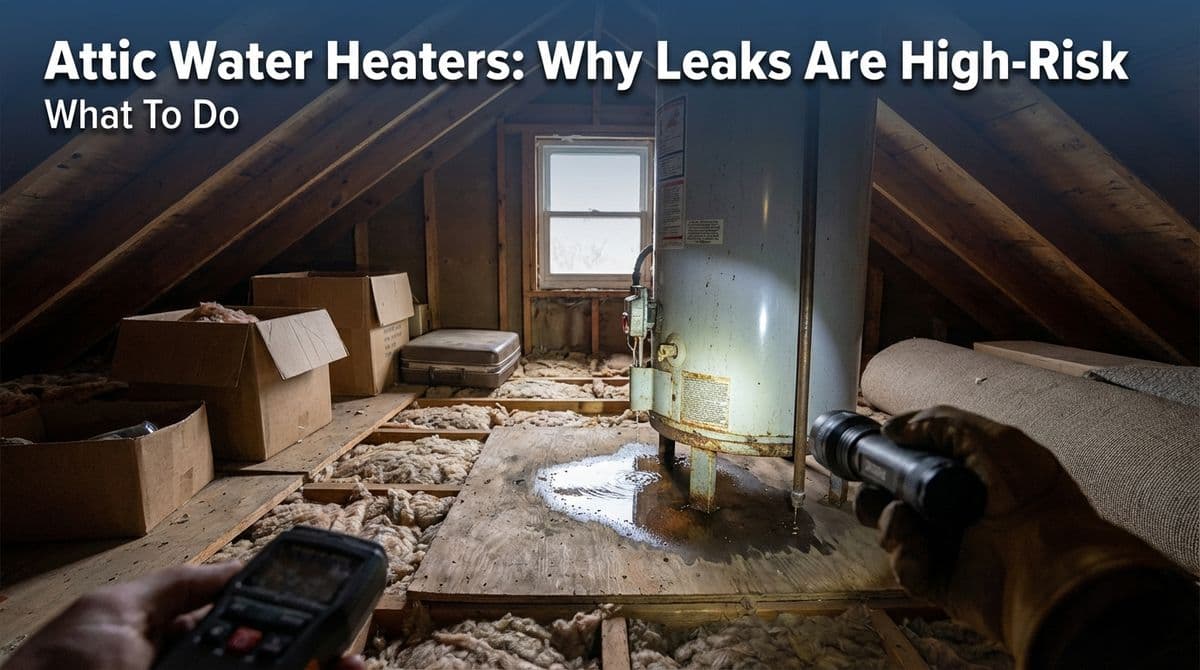
When Emily climbed up there, she saw water in the drain pan under the water heater, and the wood beneath the pan was damp. The drain pan wasn’t overflowing, but there was just enough water to make her nervous. A friend had helped her shut off the water supply to the tank and drain it with a hose, so by the time she called us, the dripping had stopped and the carpet was starting to dry. Her big question to us was: “Is it safe to wait, or is this an emergency?”
That call is a perfect example of why we always say: water heaters in the attic are high-risk, and even a “small” leak deserves quick attention.
Why Water Heaters in the Attic Are So High-Risk
When we were talking with Emily, we explained that the location of the water heater is what turns a minor leak into a major problem. A typical 40–50 gallon tank sitting over your living space has the potential to cause thousands of dollars in damage if it lets go.
Here’s what makes attic water heaters especially risky:
- Gravity is not your friend. Any water that escapes that tank wants to find the lowest point — which is usually your ceilings, walls, insulation, and flooring.
- Small leaks are easy to miss. In a garage or utility room, you’re more likely to notice a puddle early. In the attic, you often don’t see anything until it’s soaked through the ceiling.
- Drain pans and drains are not foolproof. The pan under the heater is just a secondary defense. If it’s rusted, cracked, undersized, or the drain is clogged or missing, water will hit the framing and drywall instead.
- Full tank failures are catastrophic. If the tank wall ruptures, you’re not talking about a drip — you’re talking about dozens of gallons of water being released quickly, right above your home.
So while a little water in the pan might not look like much, it’s a clear warning sign that something in the system isn’t healthy.
What Emily Did Right (And What We Always Recommend)
Before we ever stepped foot in her attic, Emily had already taken three really smart steps — the same ones we recommend to anyone who notices a leak from an attic water heater.
1. Shut off the water supply to the heater
Her friend had shown her how to find the cold water shutoff valve on top of the tank and close it. That one move stops the tank from refilling and can prevent a small leak from turning into a constant flow.
If you see a leak:
- Look for a valve on the cold (usually blue) line above the heater.
- Turn the handle clockwise until it stops, or move the lever so it’s perpendicular to the pipe.
2. Turn off the power or gas to the heater
Emily was able to flip the breaker to the water heater while she was up there. If you have a gas unit, there will be a gas control knob you can turn to “off” or “pilot.” This keeps the heater from trying to heat an empty or partially empty tank, which can damage the unit and create a safety issue.
3. Contain and document the leak
She put a bucket where the ceiling was dripping and took pictures of the pan, the damp boards, and the wet spot on the carpet. That helped us understand what was going on even before we arrived, and it also gave her documentation in case she needed to talk with her insurance company.
Is It an Emergency If the Leak Seems to Have Stopped?
When we talked to Emily, she felt a little better because the dripping had stopped after shutting off and draining the heater. She was willing to wait a few days if needed. From our side, we told her exactly what we tell everyone in this situation:
- From a flooding standpoint: If the water is off to the heater, the tank is drained, and nothing is actively dripping, it’s usually not a middle-of-the-night emergency.
- From a risk standpoint: An attic water heater that has leaked once has warned you. We strongly recommend getting eyes on it as soon as reasonably possible — usually within a day or two.
- From a comfort standpoint: You can live without hot water for a short period if you have to, but we don’t like to leave anyone that way longer than necessary.
In Emily’s case, we arranged to stop by right after another job nearby so we could inspect everything and give clear options: repair (if safe and code-compliant) or replacement.
Common Causes of Attic Water Heater Leaks
Once we’re on site, we look for where the water is actually coming from. In an attic, it can be tricky to tell. Some of the most common culprits we see are:
- Tank failure: Corrosion at the bottom of an older tank causing slow weeping or an eventual rupture.
- Temperature & pressure relief valve (T&P valve): Opening due to excessive temperature, pressure, or a failing valve, and discharging into the pan.
- Plumbing connections: Loose or corroded fittings on the hot/cold lines or the relief line dripping into the pan.
- Condensation or roof leaks: Sometimes what looks like a water heater leak is actually condensation on ductwork or a roof leak landing in the same area.
- Damaged or missing drain pan/drain line: Even a small leak will escape if the pan is cracked, undersized, or not properly piped to a safe drain location.
We never recommend guessing at the cause when a water heater is in the attic. A proper diagnosis is the only way to know if a simple fix will do or if you’re due for a full replacement.
What We Check When We Inspect an Attic Water Heater
When we come out to a home like Emily’s, we don’t just look at the one obvious leak and call it a day. Attic units get a full safety check because of the potential damage they can cause.
Our inspection typically includes:
- Age and condition of the tank and any visible rust or corrosion
- Condition and capacity of the drain pan
- Proper, unobstructed drain line from the pan to a safe discharge point
- Operation and discharge piping of the T&P valve
- Support framing under the heater to ensure it’s properly braced
- Electrical or gas connections and venting (for gas units)
- Evidence of past leaks or staining around the unit
From there, we walk homeowners through whether a repair is truly safe and sensible, or if replacing the heater (and sometimes upgrading the pan and drain) is the better long-term move.
Insurance, Damage, and Why Proactive Action Matters
Many homeowners ask us, “Will insurance cover this if the heater really lets go?” Every policy is different, but we’ve seen a few general patterns:
- Sudden, accidental damage (like a tank bursting without warning) is more likely to be covered than long-term, neglected leaks.
- Visible warning signs (stains on the ceiling, known leaks, corrosion) that went unaddressed can complicate claims.
- Code issues — such as missing pans, improper drains, or unsafe installations — can raise questions during the claims process.
We’re not insurance adjusters, but we always encourage homeowners to document what they see (photos, dates, any steps taken), call their agent with questions, and address problems quickly. Being proactive can reduce damage, make claims smoother, and protect the value of your home.
How We Safely Access and Work in Tight Attics
Another concern we hear is, “How are you even going to get up there safely?” Attics can be cramped, hot, and tricky to navigate. When we work on attic water heaters, we take a few extra precautions:
- Use stable ladders and temporary platforms or boards to protect your ceiling and framing.
- Bring appropriate lighting so we can clearly see pans, drains, and connections.
- Plan the removal and installation path in advance — sometimes cutting an access panel or using a smaller, more manageable unit is safer.
- Protect surrounding insulation and finishes as we work to avoid unnecessary mess.
We treat your attic like part of your living space, because anything that happens up there eventually shows up down below.
Quick FAQ: Attic Water Heater Basics
Are attic water heaters allowed by code?
In many areas, they are allowed, but building codes usually require specific protections: an approved drain pan, a properly piped drain line, a T&P relief line, and adequate access and support. We always install and repair to local code and manufacturer specifications.
Should we move our water heater out of the attic?
If space and budget allow, relocating to a garage, utility room, or even converting to a tankless system in a safer location is often a great long-term solution. We discuss those options when we see that an attic installation is more risk than it’s worth.
How often should an attic water heater be checked?
We recommend a quick visual check at least once or twice a year and a professional inspection every few years, especially once the unit is older than 8–10 years.
What to Do If You See a Leak from Your Ceiling
If you ever find yourself in Emily’s shoes — a wet spot on the carpet, a drip from the ceiling, and a water heater in the attic — here’s the simple game plan we walked her through:
- Shut off water to the heater.
- Turn off power or gas to the heater.
- Contain the water with buckets or towels and take photos.
- Do not keep using the heater, even if the dripping stops.
- Call a licensed plumber and mention that your heater is in the attic.
We were able to get to Emily quickly, assess the situation, and put a safe plan in place so a small leak didn’t turn into a big headache. If you’re seeing any of the same signs, we’re always happy to get eyes on it and help you protect your home.